Here’s what you need:
- Ground Cinnamon – 1 cup (and no, the ounces on the can of spices is not volume specific – it’s weight specific)
- Applesauce – 1 cup (we used cinnamon applesauce as if the cup of cinnamon wasn’t enough)
- White School Glue – ¼ cup
- Waxed Paper
- Rolling Pin
- Cookie Cutters (or a small juice glass you can use as a circle cut out)
- Willing small child helper
Optional:
- Paint – we used glitter pain in red and green
- Stickers
- Ribbon
*** If you are making this for a classroom of 15 – 20 kids, use 4 cups cinnamon, 3 cups applesauce and ½ cup white glue.
Both times that we made this recipe, we halfed it.
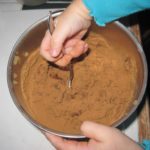
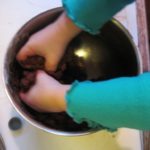
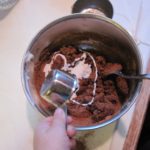 Princess Cupcake was more than happy to help dump the ingredients into the bowl and stir it together. It takes all of a few seconds to get the dough mixed up. If the consistency seems a little too stiff, add a smidge of water — although we didn’t have to either time – it was plenty moist.
Once you have it mixed, smush it together and wrap it in plastic wrap and set it on the counter. Distract small helper for one hour.
After an agonizing two-fer of Yo Gabba Gabba, you’re ready to roll some dough!
Grab your rolling pin and the waxed paper. The instructions I started with said to roll it between two sheets of waxed paper, but I found that it got wet and started to tear and stick to the dough so I switched to our smooth marble cutting board and one top sheet of waxed paper between my rolling pin and the dough.
Roll to about ½ inch thick — ideally. Sadly ours fell victim to excessive rolling due to an exuberant small chef, but they will still turn out just fine.
Cut out shapes with your favorite cookie cutters or go freestyle. We were creatively constrained by the lure of the cookie cutters. Apparently the conformity is quite the hit with the under 3 set.
DO NOT FORGET TO POKE A HOLE IN THE TOP OF THE ORNAMENT so that you can string your ribbon or ornament holder through it to hang it on the tree. We used a straw to put a hole in ours – but that hole did seem a little on the large side. The second go around we used kabob skewers. CAUTION: kabob skewers look remarkably similar to conductor wands with the exception of the sharp points on the end which will be waived alarmingly close to mama’s eyes while she is transferring ornaments from work surface to baking tray. Sigh.
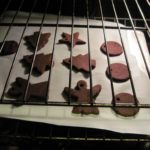 Don’t worry if the ornaments seem a little heavy. When they dry they are much lighter. Speaking of drying. You can air dry them (Eee gads, takes days), or you can pop them into a 200 degree oven for 2 hours – flipping once half way through.
Word of advice. Even after baking these, no matter how tempting, do not put them in an airtight container until you are ready to decorate them – should you decide to decorate them. They will be a little moist or remoisten. I dunno. I did it, and regretted it. Let the buggers breathe.
So for some odd reason I thought the ornaments would be a lighter color of brown after they dried. They aren’t. They are that rosy dark brown that the dough is, it doesn’t change. At all.
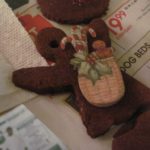
Princess Cupcake made these the first time for all of her teachers at school. She had carefully chosen a set of vintage looking 3-dimensional stickers to put on them, and some matching ribbon. As an afterthought, I had also picked up some glitter glue in green and red in case she wanted to paint some of them. Call it mother’s intuition but this ended up being the project-saver.
Turns out the ornaments have a bit of a rough surface that do not lend themselves well to sticker adherence. Princess Cupcake was not deterred, she didn’t seem to notice and painstakingly chose a sticker for each tree, angel, ball and star. I was so sad that the stickers wouldn’t stay and was about to hot glue them as soon as she went to bed. But then I offered up the paint – she never says no to paint.
We started off trying to be a fancy with the paint. I got out some Christmas punches and card stock and made some stencils for her to use for the paint. 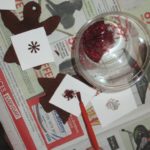 Great idea in theory — and she was all for the extra step, but the detail was small and since the surface was uneven, the paint didn’t stay in the shapes very well and turned out rather blobish. So we moved to plan C. Just paint the sucker.
Once she slathered the paint on (and it dried), we discovered that the stickers stuck just fine.
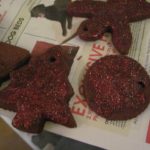
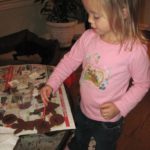 Princess Cupcake is only two and a half, but she was heavily involved in EVERY aspect of this project. The portioning (she can squeeze glue and shake cinnamon). The mixing. The covering with plastic wrap. The rolling. Choosing the shapes and making the ornaments. (Mommy did the oven part.) The painting. The stickering. She chose the ribbon colors. (Mommy strung it through the hole and did knots.) She very purposefully chose which ornament to give to each teacher and neighbor. She helped put them in the envelopes and she put the bow on each envelope. And I have to tell you, the look of PRIDE on her face as her little outreached hands gave each one to her intended (including Daddy) brought tears to my eyes. And the fits of giggles as she told each one, “You no EAT it DAAAAA-DEE!” and “No EAT it! It’s not a cookie. It’s orma-ma-ment,” and they playfully pretended to take a bite, followed by a big bear hug and smiles from ear to ear. These are memories that I will likely hold in my heart for a long, long time.
Tweet


 What’s your happy place? Crafting? Cooking? Cocktails? Party planning? Yes please! I love it all, and I’ve tried a lot. Check out my how-to’s! What should we do next?


0 Comments